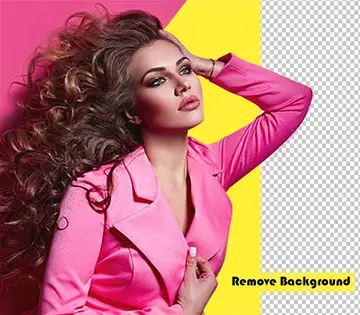
Best way to cut out by Photo clipping path service
Photo clipping path – Photoshop have a strong feature or tool to manipulate the image guideline or edges. Photo Clipping path or deep etched service is one of the key feature. If you want to get the best clipping, you might learn how to make an image clipping first. In this article, we describe on clipping path InDesign, photo clipping, multi clipping path, which can be used to photo cut out. Photo Editing provider use this technique to remove the background or background removal service of an image.
Commonly there are a few important things to do before publish or upload an image on the web. In addition, photographers keep the background and many items to remain the product’s alignment right during the photo shoot. So it is important to make an image cutout before it goes online.

Any image editing software can easily do this service. In this article, we will get some way how to edit a photo. To make these processes easier, we pick Photoshop (CS3 version). The primary task is to target the product outline or edges. Now, I’m going to explain below in this post. In addition, there have added some sample images for lessons.
To learn how to remove backgrounds in the latest version, you can refer to this blog post: Photoshop Background Removal (Update 2024).
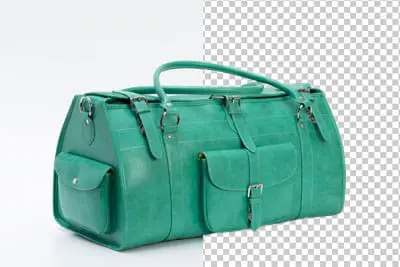
A quick clipping path is a common technique to remove unwanted things from an image. Several ways are using the clipping path by Photoshop. So here, we explain the best possible way to explain a photo cut out visually. Clipping path or deep etched service is commonly known to cut the unwanted object apart from an image. The best practice is to draw a clipping path image that is hand-made. In Photoshop, few features are available that you can use. Quick selection tool, Magic wand tool, and Pen tool can create a photo clipping path on an image.
Photo clipping path by Quick selection tool
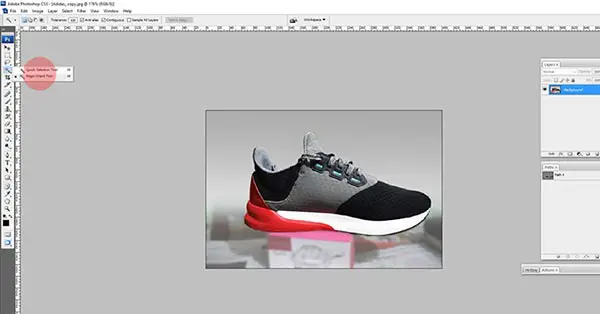
The quick selection tool helps to make a quick image clipping path. In the Photoshop sidebar menu, the “Quick selection tool” is available. Select this tool and softly brushes over the product of the image. A quick selection outline is visible over the image edges. The selection will touch the edges of the product. If it satisfies the result, anyone can convert this selection into a clipping path. Go to the Window menu and activate the Paths feature. Firstly the Paths Palette “Make work path,” The user can set the feather 0.3px to 0.5px depending on the edge softness. To set the feather, select the Alt+Ctrl+D (SHIFT +COMMAND D in Mac) keyword from the keyboard. A popup box will appear and set the minimum value.
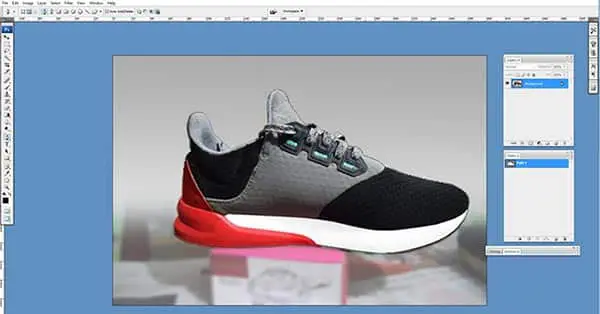
Now from the top bar menu, select the Layer-> New -> Layer via copy. The shortcut for this task is Ctrl+J. Using this option, a new layer will be created. It can be checked from the Window menu inside the Layer option. Finally, a transparent part of the image will be isolated and omitted the unwanted things. The quick selection tool is easy to make an image cutout easily. But it has some pros and cons to using this tool. It saves a lot of time, reduces your hard work. But in most cases, the edges can not make selection properly. An image with shadows, unwanted objects, and a mixed background-color impact underline or touch the product’s edge. Otherwise, this tool is potent to make the isolate of your product from the background.
Magic wand tool
Photoshop has another option or feature that we can use to make a photo clipping path. Magic wand tool is one of them. Select the tolerance value as per product density and outline. Here we used 80 for this product. Smoothly brush on the surface area, and it will appear. Sometimes the selection results make not perfect. In that case, you can use add more of the selection desire areas what you are looking for an isolate. Moreover, we can use the Alt key to remove or minus the areas we don’t want to keep in selection. Magic want tool assists you in making a selection on tiny hair, a clear product that has a solid background color.
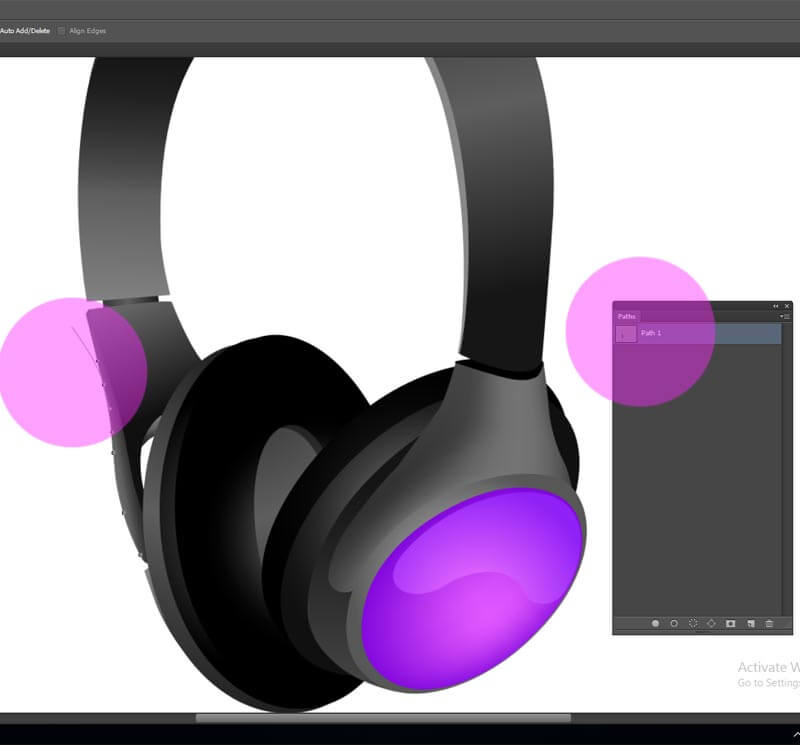
Pen tool
This is one of the powerful tools of Photoshop. Anyone can active in Photoshop Pen tool by pressing P on the keyboard. Photoshop pen tool have few sub features, therefor before work few things need to active. Top of the menu bar of Photoshop, you can see an icon similar fountain pen nib. Select that option, and beside the Shape Layer icon, a Paths icon will be visible. Mark that icon and later click on Pen options -> Active the Rubber Band box. Finally, activate the box of Auto Add/Delete feature and press on the Exclude overlapping path areas. That’s it; the pen tool is ready to make the photo clipping path.
Now try to make the path over the edges of the product. Below is the sample image of how to make the path. Most importantly, uses of Photoshop pen tool is the primary necessity of graphics design filed. Moreover, you can see the quick preview. After complete the clipping path. Make a selection and press “Q” on keyboard. Later the quick preview will visible.
There are lot of causes to take advantages from this feature. Above all, anyone can get some knowledge about pen tool. Moreover, you can find out the details video on youtube.
In conclusion, following the above options, anyone can easily make the photo clipping path and isolate the product from the background.


