How to do Invisible Ghost Mannequin Photography and create after Effects
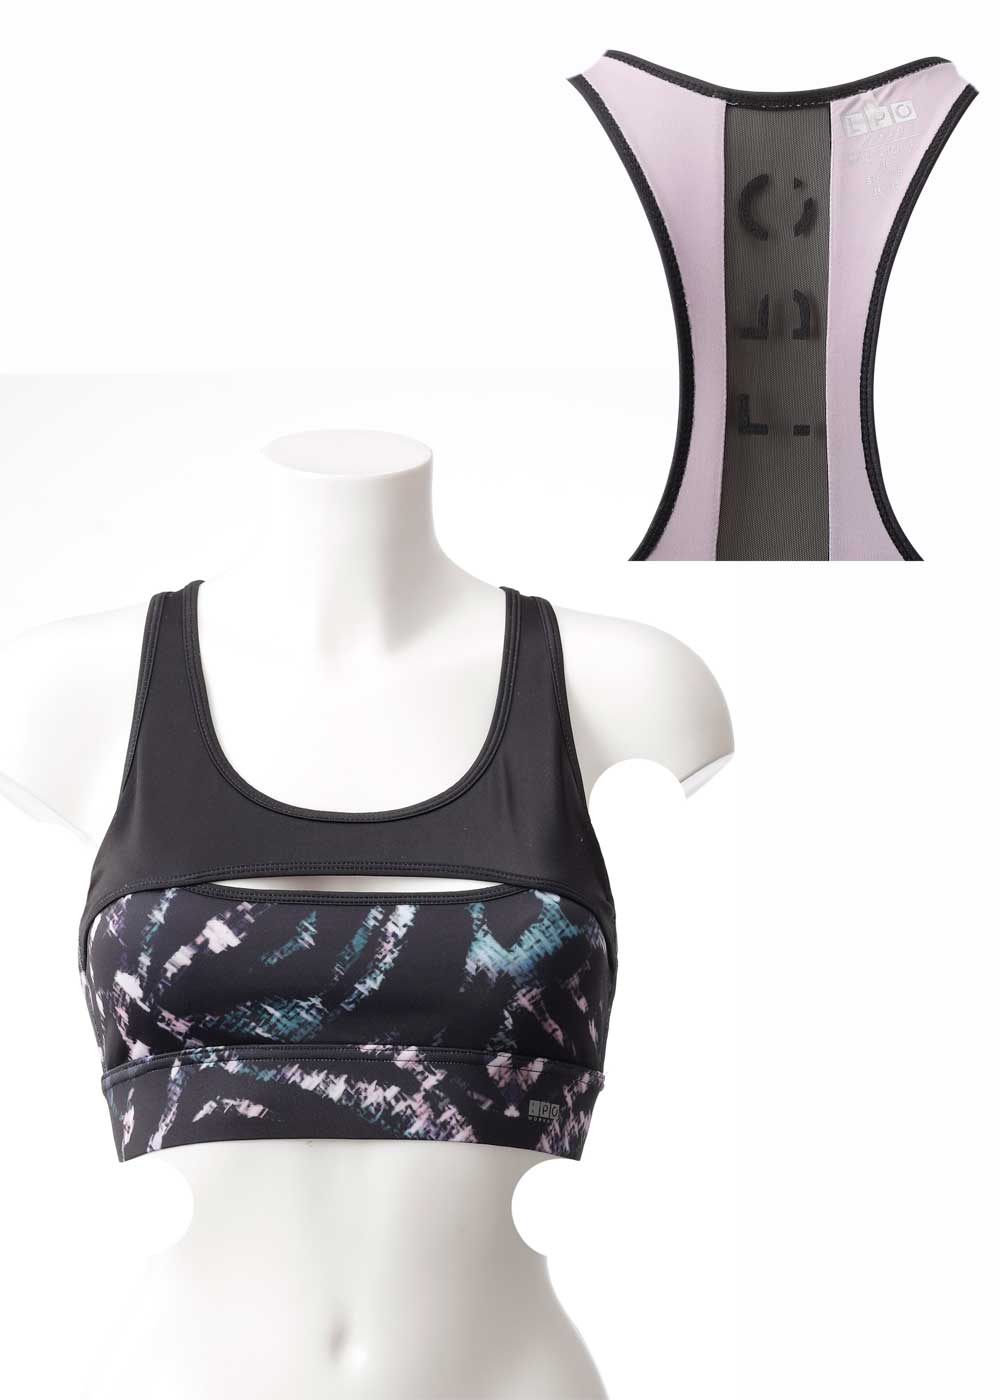

Also known as “hollow mannequin”, “3D mannequin”, or “invisible mannequin” this Ghost Mannequin effect is running successfully in the apparel business. Many clothing or apparel firms have faced issues of portraying their products without adding extra effects to them, which means portraying a neat and clean product fit to attract more customers rather than to distract them. It is certainly important for these business firms to apply the ghost mannequin effect to make the customer see the exact product details.
What is the ghost mannequin effect?
The ghost mannequin effect enables you to shoot a product on a model or mannequin and then merge the shots in post-production to eliminate the model or mannequin. The result is a realistic image that retains the attention of your product. A ghost mannequin is important as it will help the mannequin assist your apparel items to preserve their shape, resulting in more professional and consistent product images by increasing consumer attraction.
First we have to understand the basic and potential tricks of how to take the photos while mannequin photography. Let’s try to sort these things out.
How to do Ghost Mannequin Photography?
Getting a seamless ghost mannequin effect requires some assistance and guidance. Here are some simple steps through which you all will get to know the science behind ghost mannequin photography.
Step 1– First and foremost, you will need to select and pose the product through a model or mannequin.
You will need to showcase your apparel product by making the model or mannequin wear the clothes. Then the photographer will click from certain different angles.
Note – If you are using a real model then make them do the static pose. Make sure that the hair is tied up to get a neat look.
Step 2– Build the setup for photography
Once the model is ready, you will need to build the environment, that is you will need to set up the exact lighting and create other features that will make the product look more appealing.
Step 3– Clicking the photographs
After the setup is done, the photographer will click the photos from different angles to make them less tapered or inaccurate. Take a shot of the front side of the apparel or garments. If you use two mannequins then dress the other mannequin. This time apparel needs to photoshoot the inner part. Make sure the clear appropriate view of the inside out and the tags or brand name.
Note – The photographer can use a telephoto zoom lens to create less distortion.
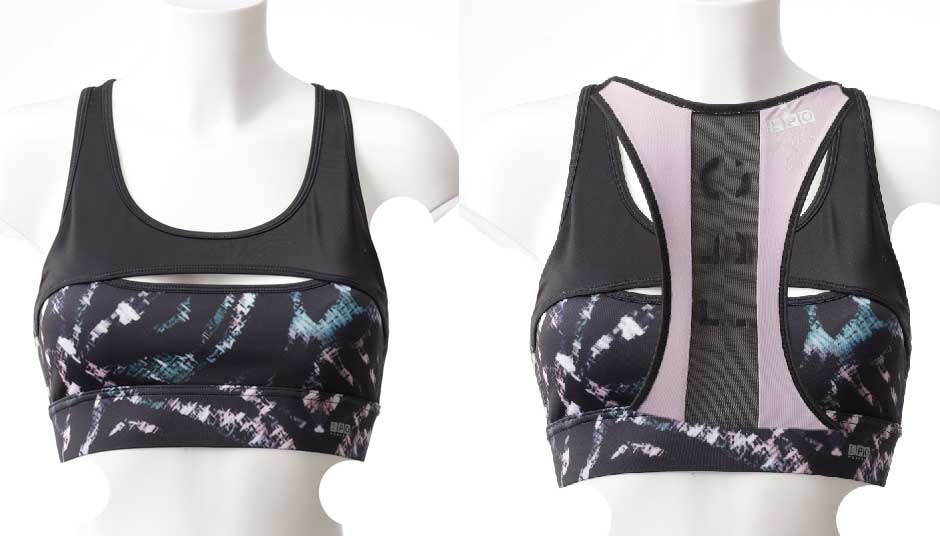

So, we have now all the essential images. The next processes have to put those images into editing and apply the touch-up for the post-production. Mannequin effects are very time consuming and need some expert level of Photoshop editors. In this case most of the photographers have opportunity to hire an expert or outsource the work. There are lot of companies operating their business globally, definitely they are online. Foto Masking is one of the reliable company, and they are doing this type of advanced editing since 2009.
Step 4– Transfer and open the files in Photoshop to create layers.
You will need to transfer the files (photographs) into the system where you will create the ghost mannequin effect. Once that is done. You will open that file and follow these below steps:
Step 5– Tap on a selection tool to select the product and use refine and mask option.
In the first step, you have to select the product and pinch in zoom. You can choose any tool like a lasso, magic wand, etc. But the best practice is to isolate the product using a clipping path. After selecting the product, there will be a refinement of your marks option and you will choose that. You can tap on “Refine Edge” from the “Select” menu and then click “Ok” from the dialogue box.
Another simple way for you to make a selection of the Path 1. See the below image. Give the feather 0.3 as it is standard for any type of cut-out.
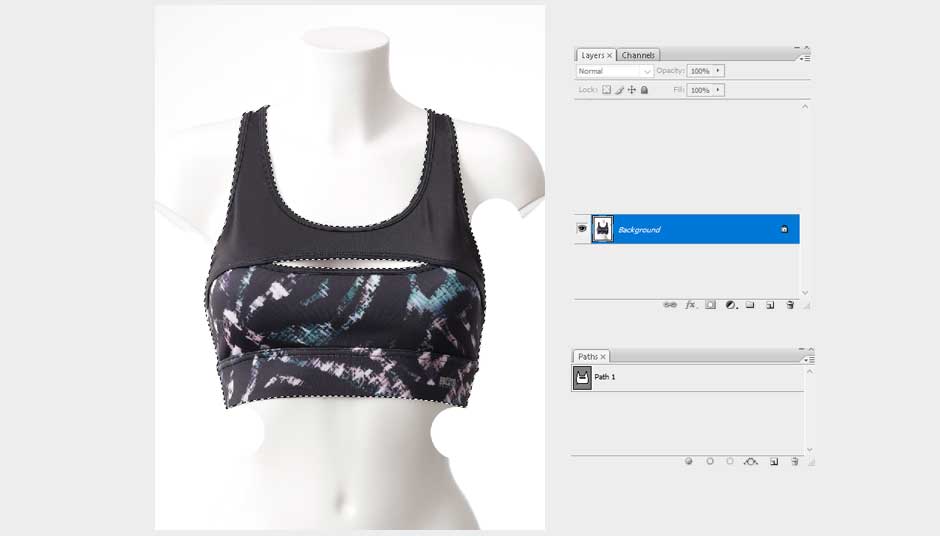

Use the shortcut option on keyboard Ctl+J. A new layer will be created which is mentioned as Layer 1 on the below image.
After creating Layer 1, press Alt+Ctrl+N and make the new layer 2. Fill the new background layer with white color #ffffff to avoid distractions. Once done your photography now it’s turn to give the effects.
The initial work completed so far. Open your ‘back half’ photo in Photoshop.
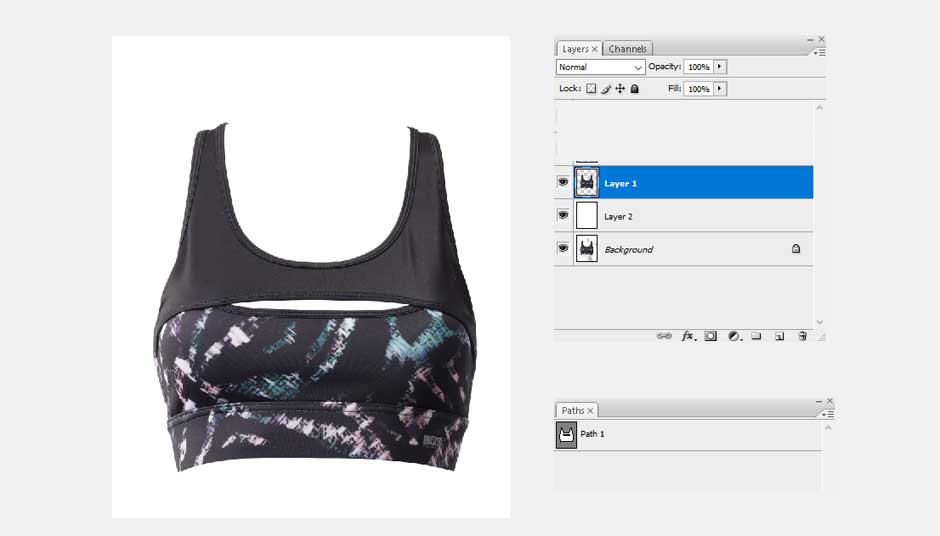

Step 6 – Use the inner-part and repeat the cut-out process.
The initial work completed so far. So we will create the back part to visible the product (Garment/apparel) and give them a 3D shape. Use the back part or inner part which has been taken during the photo shoot. See the image below.
Open it in Photoshop and choose the areas that are required for editing. Make the clipping path using a pen tool. After the above step, you will need to repeat step 5. Keep the layer ready for the next step 7, which we will describe below. The inside-out method will make the product look greater.
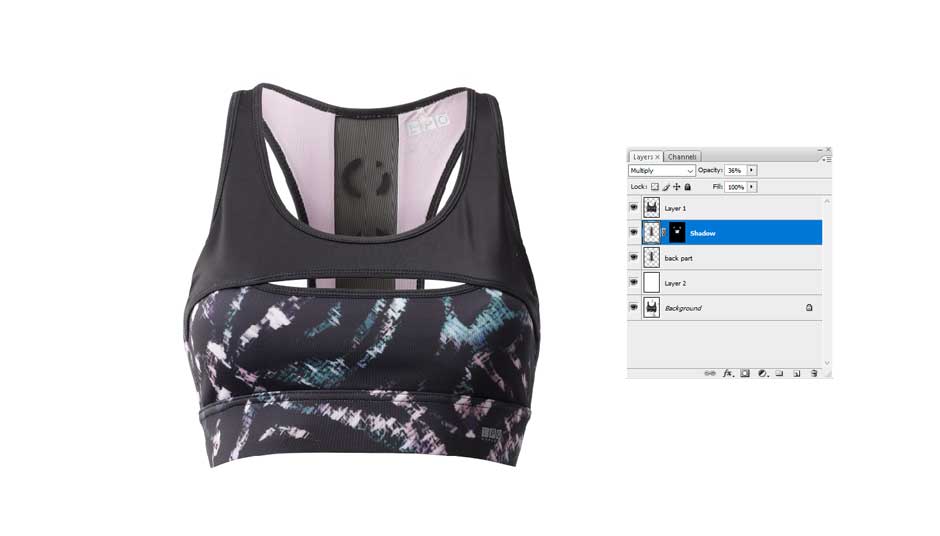

Step 7 – Remove the unnecessary part, add shadows and save.
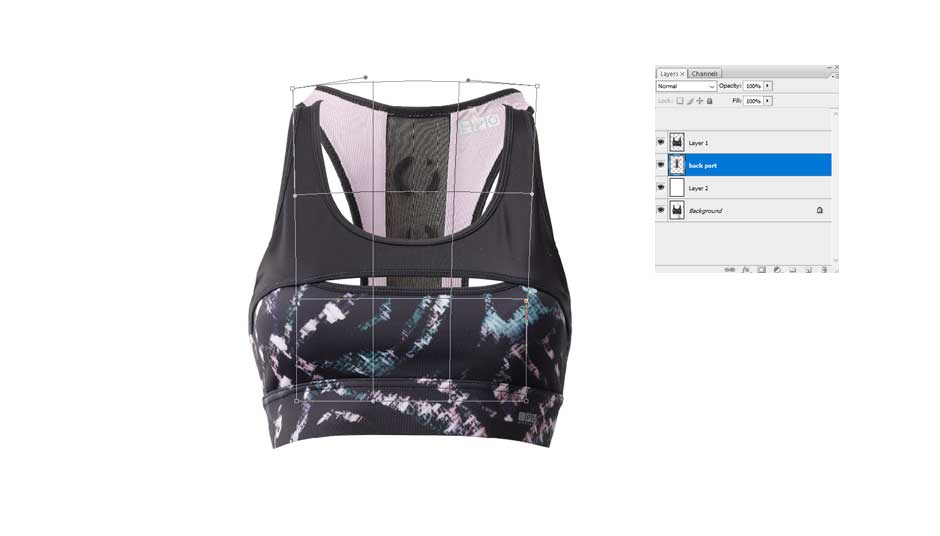
This is the important step in this editing. Now we have the back part or inner part. Make a selection by using Ctrl+A and copy this layer. Go back to the first work and paste it there. For your convenience you can rename it. In this tutorial we renamed it as “back part”.
Now adjust that layer and make it up or down. You can use a shortcut method of Ctrl + [ or Ctrl + ] sign in order to up and down the layer. Keep the layer “back part” under layer 1.
Tune the edges until it fits the top area with layer 1. You can use Ctrl+T to select the layer and Liquify it. Press Shift+Ctrl+X to activate the liquify mode.
Step 8 – Remove the unnecessary part, add shadows and save.
The last step is to remove the unnecessary part from the mannequin product and then add shadows in between two layers. After this is done the desired image would be a great 3D view of product mannequin.

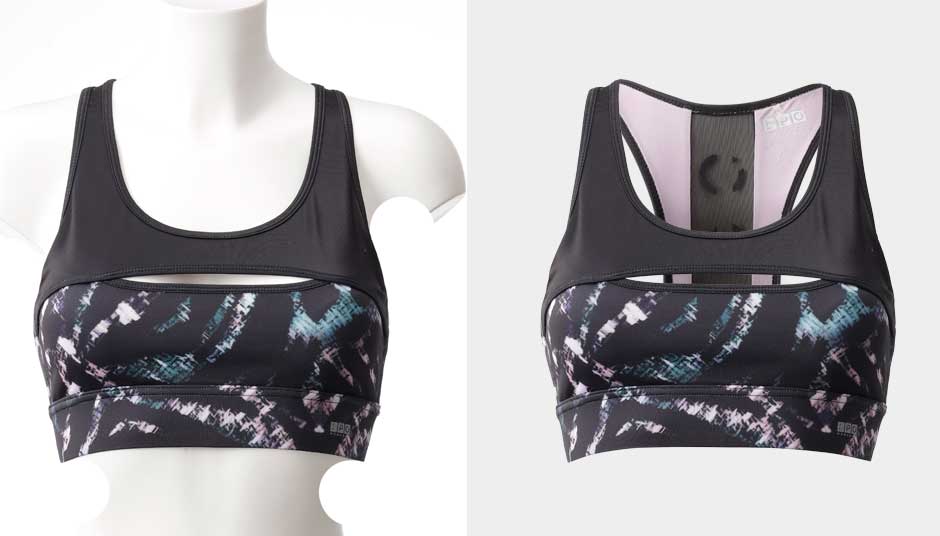

Conclusion
Hopefully, this article helped provide our audience with the exact information it needed. The ghost mannequin is something that is adopted by every apparel firm to enhance its business cycle. All the online business stores use these effects to give their product a highly professional touch. So do it, and make your business stand out from the others.

