How to Create Clipping Path in Photoshop
From graphic design to image editing, Adobe Photoshop provides a powerful range of techniques and features in one place. Among them, clipping path is an effective process that creates stunning visuals.

How to Create ?
In any case, the clipping path process is not something anyone can do with one or two clicks. This method demands precision and attention to detail to get the ultimate result. Well, that is why we are here today to make this process easier for you. In this blog, we have a comprehensive step-by-step tutorial on how to create clipping path in Photoshop. Here you go, compiling all the tips and tricks from our expert editors!
What is a clipping path?
Clipping path is a Photoshop technique where we isolate a subject from the background and introduce various editing and compositional elements. That makes the image objects transparent and clean without losing any detail.
How to do clipping path in Photoshop: Easy step-by-step tutorial
While the above definition may sound simple, this single technique plays a significant role in the current era of visual communication. In this segment, we will unfold the exact instructions to create a clipping path in Photoshop.
Step 1: Get your pen tool ready
- To begin, select ‘Pen tool’ from the Photoshop Toolbar. In case you can’t find it, type ‘P’ to get there.
- When you select your Pen tool, you can see options related to it in the application window (at the top).
- Then, select’ Combine Shapes from the ‘Path’ option.
Here is a reminder. Before you start working with the Pen tool, make sure you have your setting as ‘Path,’ not ‘Shape.’

Step 2: Draw the Path
Using the Pen Tool should be easy if you know what you’re doing. However, if you are a beginner, here’s what we recommend.
- While using the Pen tool, click along the required picture edge.
- Next, click again for the next point without releasing the mouse button.
- Now, continue creating a curved path while dragging the mouse along the object’s edge. Once you get the desired curve, release the button.
- You want to create a path around your object this way.
- Now, for the final step, position the Pen tool at the beginning of the Path.
- You will notice a small circle beside the Pen tool pointer.
- Finally, close the Path by clicking the first point. You can modify your Path points using the Direct Selection Tool.

Step 3: Save and rename your paths
- When you think you won’t need any other changes to the Path, navigate to the Paths panel. For this, you can select Windows> Paths, and the Paths panel will appear.
- Next, click on your current Work Path, go to the Panel menu, and then select ‘Save Path.’
- Remember to rename your paths since you will likely work with multiple paths.
Step 4: Create the conventional clipping path
Continuing from the third step, let’s see how we can create clipping path in Photoshop. This is the crucial stage for learning to apply our already-made Path with direct background removal.
- For this task, you need to click on the previously saved Path and select ‘Clipping Path’ from the panel bar.
- Following this, simply save the image as a ‘PSD.’
- Thus, it will allow you to use that image while working with other design software like Illustrator or InDesign.
Here, we have created a clipping path compatible with similar applications. In this process, we will automatically get the clipped image of an object or product without the background.
Step 5: Make a selection for your clipping path
The last and final step is crucial for e-commerce businesses. Most of the work of the Fotomasking team is related to the clipping path services for e-commerce product photos. And this task involves the complete background removal of the product photos. Let’s explain how we do it.
- We have our Path ready. So now we need to edit the image. For this, open the Layers panel from Window > Layers. You will find it under the dropdown menu at the top.
- If your required layer for the product image is locked, double-click it and make it Layer 0 in the dialogue box. Press ‘OK’.
- Next, in the Paths panel, keep the existing Path selected. Then, choose the option ‘Make Selection’ from the Panel menu.
- You need to set the Feather Radius to 0.
- Click Photoshop’s dropdown menu. Go to Select>Modify>Contract.
- A dialog box will appear. Keep the Contract Radius to 1. Hit ‘OK’.
This step ensures perfect clipping without any unwanted background traces.

Using clipping paths in various situations
We have now discussed how to create clipping path on image. This is one of the most widely used techniques in the world of photo editing. Let’s learn more about what it involves.
In product photography
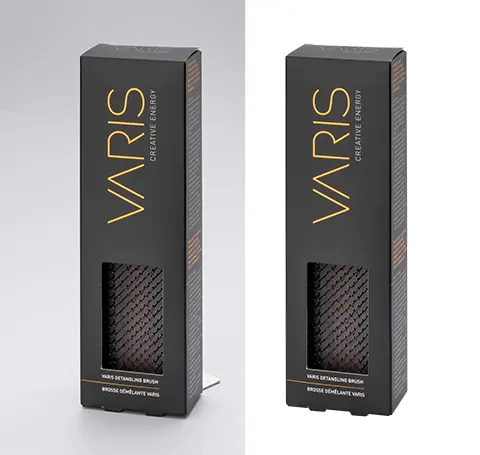
E-commerce photo editing uses clipping paths a lot. Most business owners want their products to stand out. By using clipping paths, editors can remove unwanted backgrounds/objects from images. Sometimes, the items in the photos need to be separated from their original backgrounds. That is when editors apply this technique to make them e-commerce-ready.
In creative or functional contexts
Object isolation is useful when you need to isolate something precisely. With clipping paths, we can separate other environmental objects like animals, people, trees, buildings, etc., in the creative editing process.
In image masking
Clipping paths are crucial to Photoshop image masking. This process blends multiple photos with a smooth finish.
Moreover, a clipping path can be your go-to way if you need to place objects from a photo in a different setting or background. All these applications make the clipping path method an essential part of graphic design, copywriting, web design, and digital art.
Final thoughts
A clipping path is a game changer in e-commerce, where businesses can showcase their products effectively. Additionally, clipping paths can be helpful for brand storytelling in various design projects.
Moreover, even from a cost-effective standpoint, it’s a simple process to make images print out ready. Needless to say, the clipping path is a versatile tool for graphic designers, photographers, illustrators, and anyone who wants to enhance their photos or images. We believe that after this complete tutorial, you will find it easier to apply clipping paths even if you have basic design knowledge. Happy editing!


